How to apply clipping mask in Adobe ( ai ) illustrator. According to Adobe – CLIPPING MASK is a group of layers to which a mask is applied”. Suppose you have a shape in the top layer and you have placed an image below it. Then after applying clipping mask you shall be able to see the image only through the boundaries of shape. Other portion of the image should remain hidden. The bottom – most layer defines the visible boundaries of the entire group of layers of shape, images. But description does not clarify a clipping mask. You have to see the result.
Clipping Mask
There are so many masking in Adobe illustrator and also in Adobe Photoshop. As this is a tutorial on Adobe ai so I shall not discuss Photoshop here. But in ai or illustrator there exist clipping mask and opacity mask. I have discussed the clipping mask below.
Simplest clipping mask in Adobe illustrator
An image should be shown in shapes. This is clipping mask.
My target: I have taken an image in lowest layer and then drawn few separate rectangles on it. The image should be shown only through the drawn rectangles. That means image will be masked by the rectangles drawn. Here rectangles indicates the shapes and you can draw any shape. Your first job is to place an image
Picture: 1
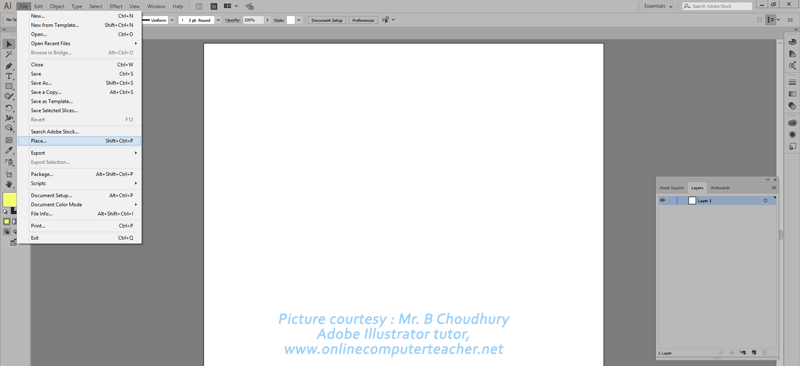
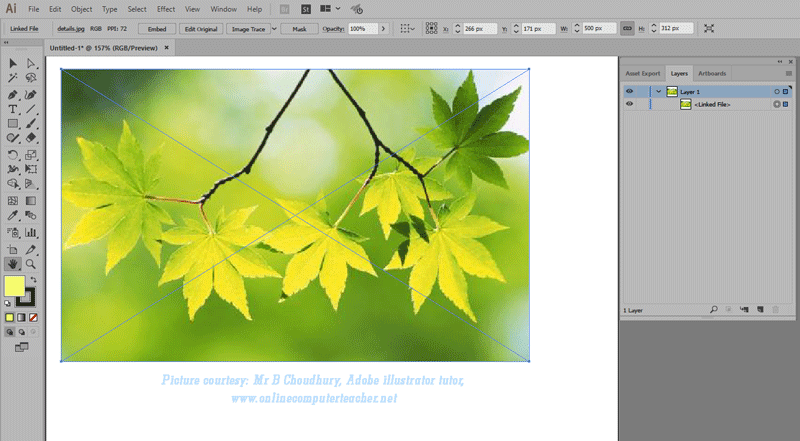
Step1: Place the image on the art-board, In top menu-bar go to: File > place , Then select the image you want to place on the Art Board
Picture: 2
After placing an image on the art-board you will see the above picture. Now your job will be to place the rectangles above the image. Whenever you draw anything in Adobe Ai then it is placed in layer or sub-layer.
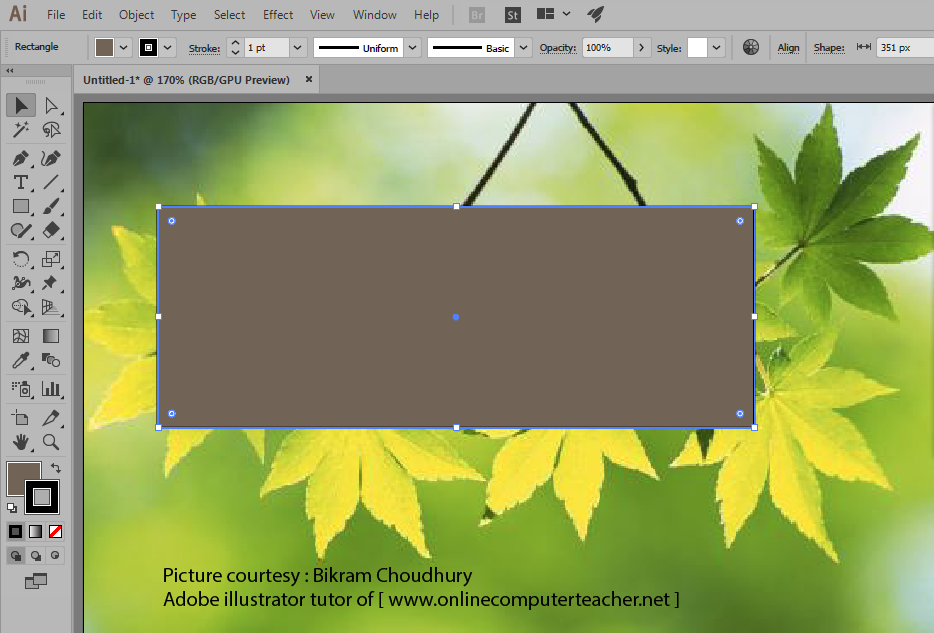
Step 2: So select the rectangle tool from the tools panel and draws a rectangle. It may have some fill or stroke. The drawn shape (rectangle) portion will be visible after applying masking.
Picture: 2a
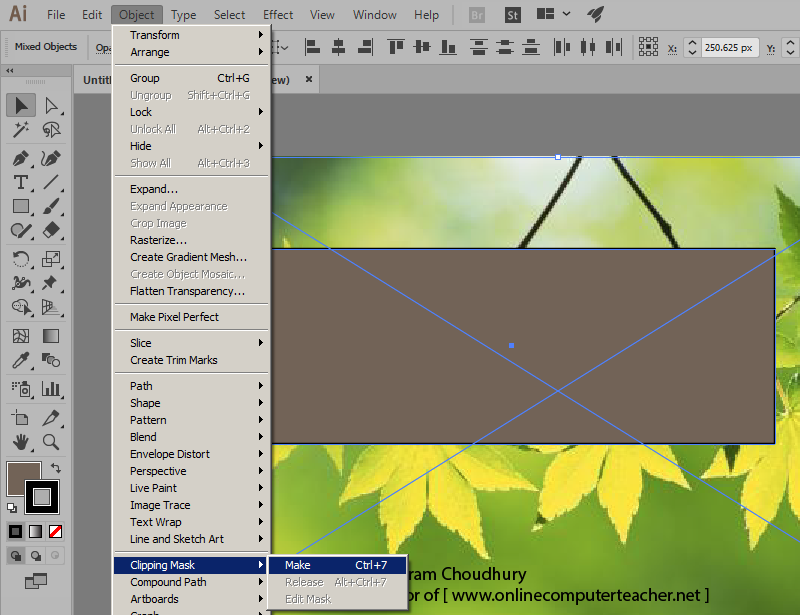
Step 3: You have placed already a rectangle in previous image. So now your job will be to select everything for masking. Select the black arrow tool and draw a invisible rectangle covering everything ( image and shape both). Then you will get the following figure. You can start dragging from the grey area just beside the tools panel.
I have shown the layers panel below to show you the drawn objects.

Picture : 2b
Step 4 : Now go to the menu bar, click on Object > Clipping Mask > Make
Picture : 2c
& VOILA!! You got a clipped image. Its shown below. Here masking applied by only one vector shape (rectangle).

Picture: 2d
Now we have applied clipping mask using one shape and its successful now. But if we have lots of shapes, even they are not connected & be distinct completely isolated shape, then ?? What to do ?
Apply clipping mask using multiple distinct shapes
Follow steps 1 to 4 stated above: Draw rectangles (Draw multiple rectangles using rectangle tool). Fill the rectangular shape drawn with color “light green” or any color you like, apply stroke black or no stroke.

Picture : 3
In the above picture only last rectangle is highlighted and rectangle tool is selected in the tool box. Also the layers panel has been shown to check the shapes in layers panel.
Picture : 4
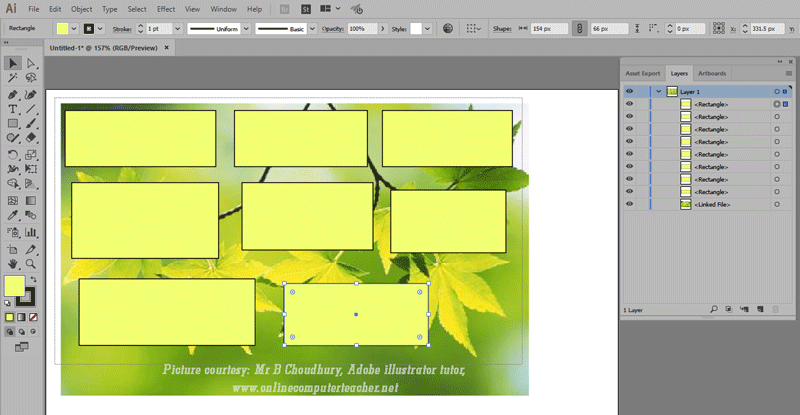
Step 3: Select everything using the black arrow tool or selection tool like the above picture. Drag the black arrow tool covering all rectangles and images which are on separate layers. After successful selection of all then you will see all in the following image. Shown in the following picture (5)
Picture : 5
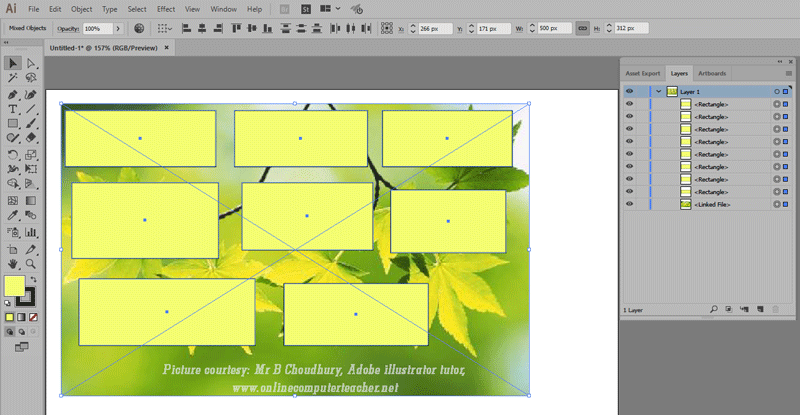
Now our job is to create the clipping mask. So Goto the menu bar,
select Object > Clipping Mask > Make
Picture: 6
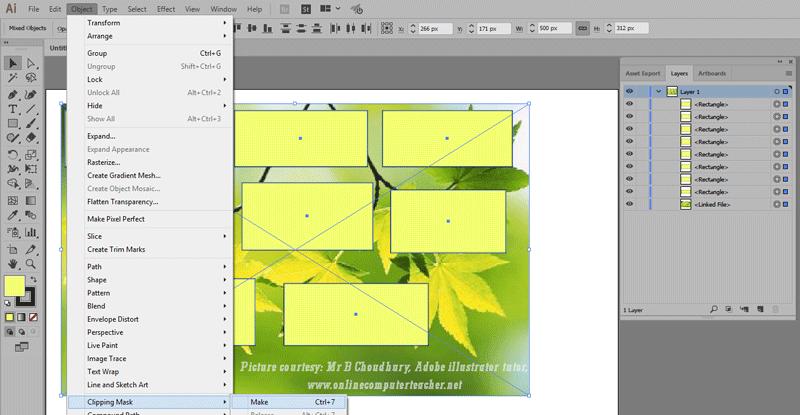
But you will find out that only the last rectangle is working for the clipping mask.

Picture : 7
But my objective was I shall make the clipping mask using all the rectangles. Only last drawn rectangular box will work for masking. Because every object in Adobe illustrator has a stacking order. So on the image the last box drawn works for masking. But this is not my target. I want all the rectangles will work for masking, not only the last box drawn.
Try 2:
So I making a plan here. I shall select all the rectangles which I have drawn and make a group of them using control + G shortcut. But before making the group I have locked the image layer in layers panel. So that it does not come into the selection of grouping.
Select all rectangles with black arrow tool. Lock the image layer before that.
Go to Object > Group. Group all the rectangles. Now select (rectangular group) & (image) both layers, & then go to Object > clipping mask.
¬But it also does not work. When you are making a group, it still maintains the stacking order among the rectangles. They just work as a unit.
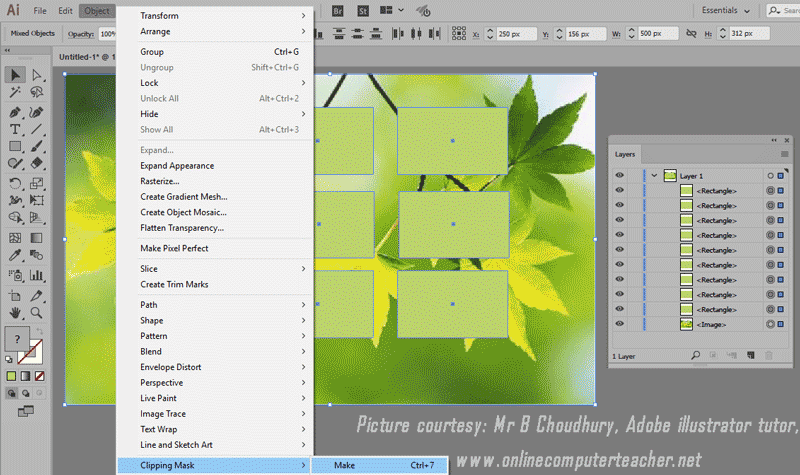
Try 3
So I shall create a compound path now. Lock the image layer, select all the rectangles using the black arrow tool.
Object > Compound Path > Make.

Picture : 8
Now unlock the image layer and select all ( Image and all rectangles ). Now illustrator thinks all rectangles as a single object. Go to
Object > Clipping Mask > Make.
Picture : 9
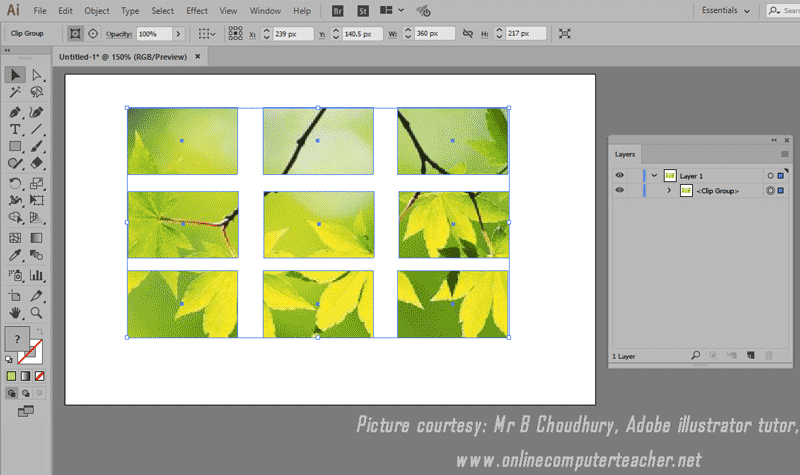
Picture : 10
This is the final image as I desired. All distinct rectangles finally applying clipping mask on the image.
Importing Image (linking and embedding) in Adobe illustrator
If you see X mark on a photo after importing it & placing it in an illustrator document that means illustrator links the photo. If you want to put the photo in your document then you unlock photo layer, select the layer & click on the Embed button. It will increase the file size.