This is a tutorial on Stroke Panel of Adobe illustrator. By the stroke panel you can change the thickness of a line, rectangle or circular shape drawn. Even you can make the corners rounded, you can convert a line to an arrow, double headed arrow and more. This tutorial written by Adobe illustrator training course guide Mr. B Choudhury.
Tutorials Home Page > Free Adobe illustrator tutorials
1. Select LINE Tool , shortcut key \ ( back slash )
2. Draw a line, normally it will be a narrow line.
3. Ctrl + F10 or Window -> Strokes , open strokes panel
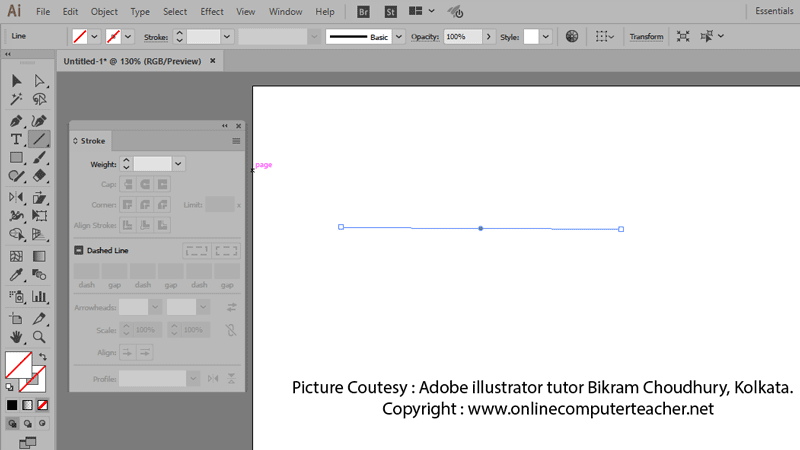
Step 1 : Firstly I have drawn a line which has no strokes. It shown below. But when you apply weight (thickness) to it, the Strokes panel components like CAP, Corner, Align Stroke becomes active. To draw strokes you need a line, so I have selected the line tool and drawn a line. It has no stroke. But still it is a line.
Picture 1:
4. Select the drawn line with Black arrow tool
5. Now our job will be to change its width… to make it thicker.
Now I am going to apply some thickness to it. Now I am going to apply 6pt stroke to it. You can change it to any thickness you want. But if a thicker stroke applied on the line you have just drawn, you will be able to see the actual path and thickness imposed to it. Actual path is always shown in blue color.
Here you can assume the line as a path, and stroke indicates the thickness
Picture 2:
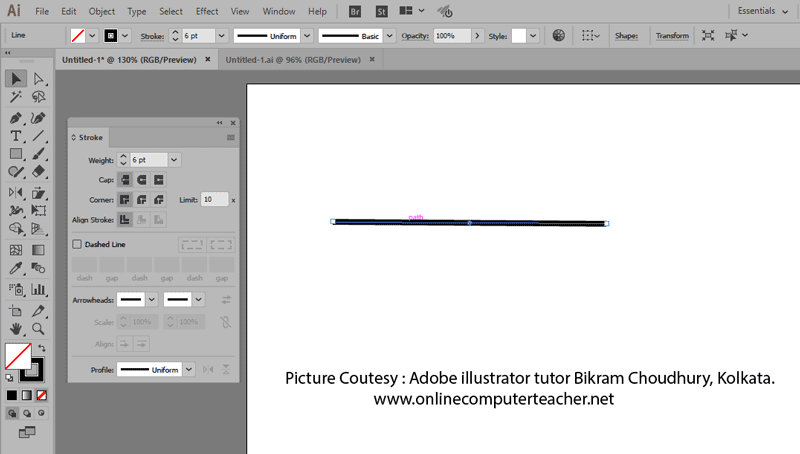
Observe that the Strokes panel components becomes active and visible in the above figure.
Picture 3:

Now select the drawn line with Black arrow tool Change its width / weight to 20 pts. Make it much thicker, in the following figure now it is more thicker.
Picture 4:
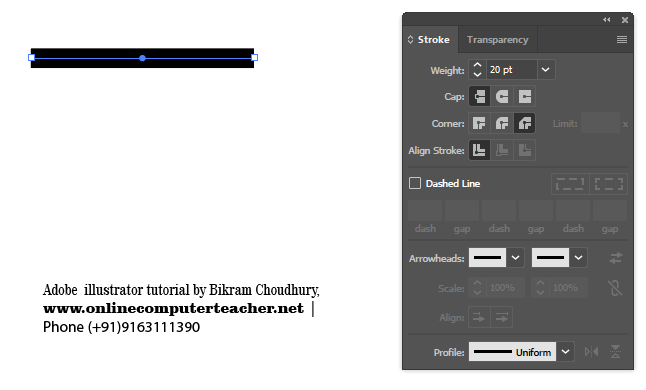
Butt Cap in Strokes Panel ( see above figure )
Now select the Cap , the left most Cap is called the Butt Cap. The above figure showing a 20pt thick line when BUTT CAP selected. Other Caps in light and selected CAP is of dark background.
Observe the Cap selected in the image. The selected cap is dark and it is called butt cap.
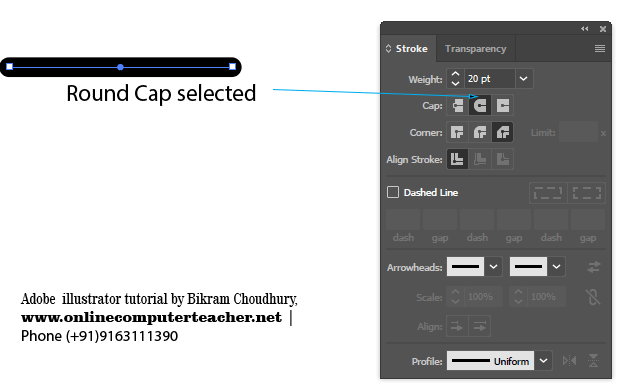
Round Cap in Strokes Panel
In the following figure I have selected the Round Cap, just beside the BUTT CAP.
Now watch the line drawn, it is selected below – view the end of the line, its rounded and watch also the main path inside it in blue colour. The ends are rounded. See the following figure.
Picture 5 :
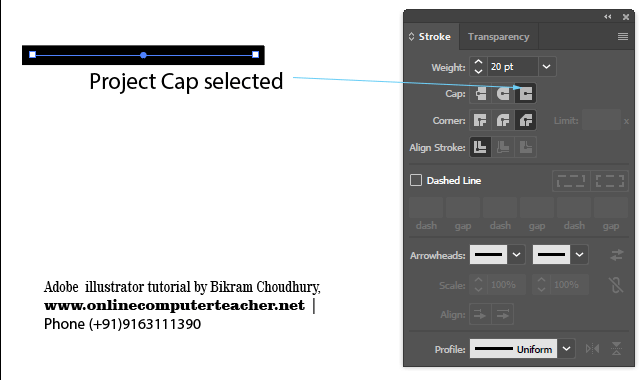
Project Cap in Strokes Panel
Now the project cap selected. Observe the changes in the line. The raw line is shown in blue colour. Thickness etc shown in black colour.
Picture 6 : Project Cap selected in Cap option of stroke panel
Corners: Miter, Bevel & Round Join
Now we shall deal with the corners in Strokes panel. But to see the corners in a better way we shall draw a rectangle using the rectangle tool. There should be no fill color and only strokes I shall apply on it.
Step1 : Choose the rectangle tool, draw a rectangle with fill none and stroke width 10pt.
Step2 : If the strokes panel is not opened then open it using (Ctrl + F10) or from the menubar Windows -> Stroke
Step3: Click on “Miter Join” of Corner option in Strokes Panel
Also watch the corners of the rectangle in the following figure when miter join selected
Picture 7 :
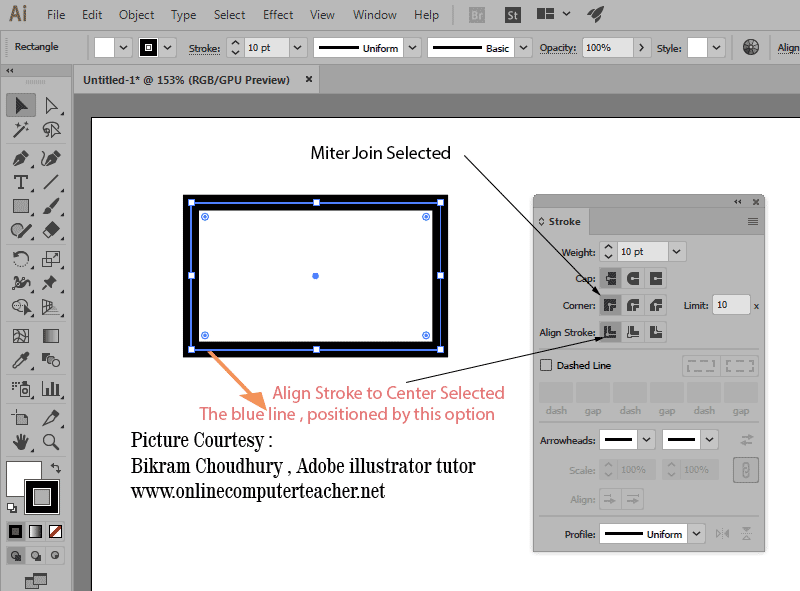
How to – “Align strokes to center” using stroke panel of Adobe illustrator :
In the above picture watch that the path in the middle of the stroke, Path mentioned by the blue line. The Stroke is of black color. The stroke is of 10 points, evenly distributed in each side of the blue line, This is because “Align Stroke to Center” selected in Align Stroke of Stroke Panel.
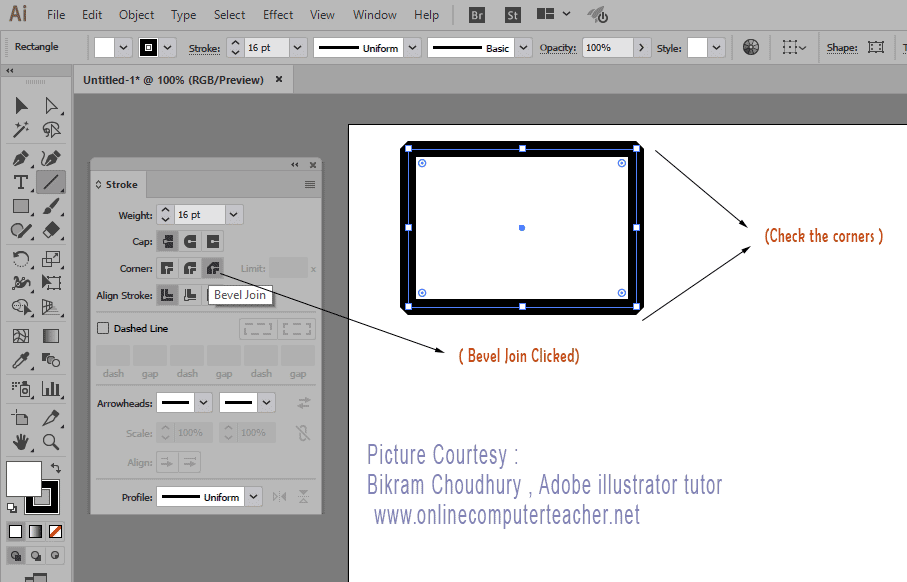
How to apply Bevel Join of corner in Stroke Panel
Now Bevel Join selected in the Corner: option of strokes panel
1) Draw a rectangle using the Rectangle Tool (M)
2) ( If stroke panel ) is not opened, then Open strokes panel (Ctrl + F10) or from the menubar Windows -> Stroke
3) In the Corner option in stroke panel select Bevel Join, make sure that the rectangle was pre-selected, or select with black arrow tool.
Picture 8:
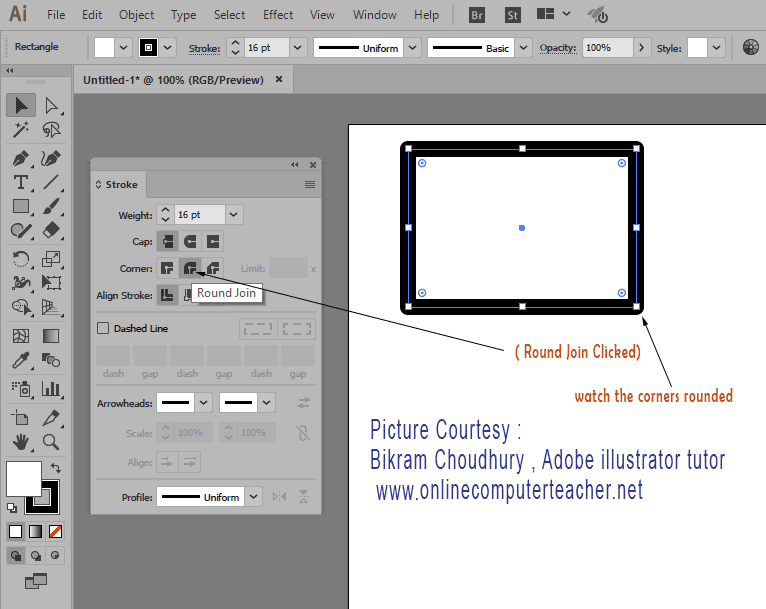
Round Join : Corners of Stroke Panel
1) Draw a rectangle using the Rectangle Tool (M)
2) ( If stroke panel ) is not opened, then Open strokes panel (Ctrl + F10) or from the menubar Windows -> Stroke
3) In the Corner option in stroke panel select Round Join (in the middle), make sure that the rectangle was pre-selected, or select it with black arrow tool.
Picture 9 : Align stroke middle selected
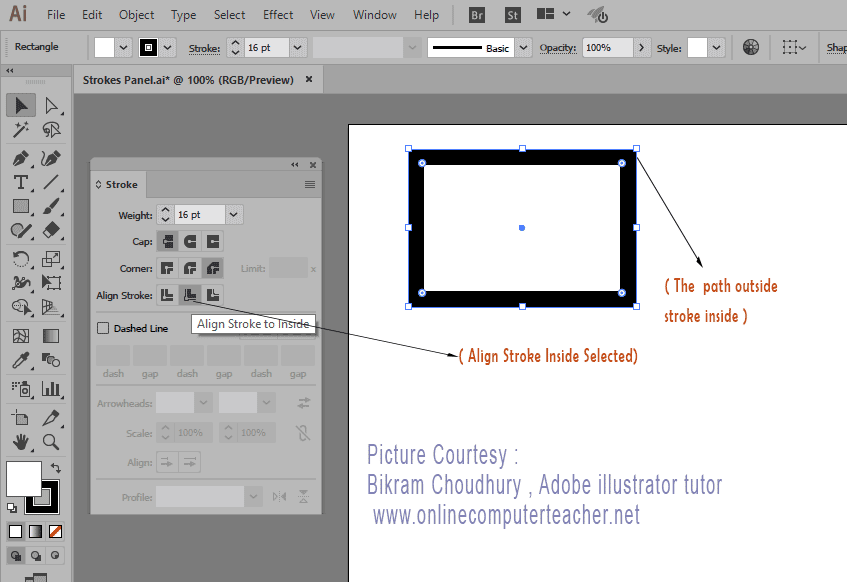
Align stroke inside : Stroke Panel of Adobe Ai
In the following figure I have shown the stroke is inside and the rectangular path is outside.
How to draw this kind of shape in which stroke should be inside ?
1) Draw a rectangle using the Rectangle Tool (M)
2)Then Open the strokes panel (Ctrl + F10) or from the menubar Windows -> Stroke
3) In the stroke panel in Align Stroke , select align stroke to inside as shown below, make sure that the rectangle was pre-selected, or select with black arrow tool.
Picture 10:
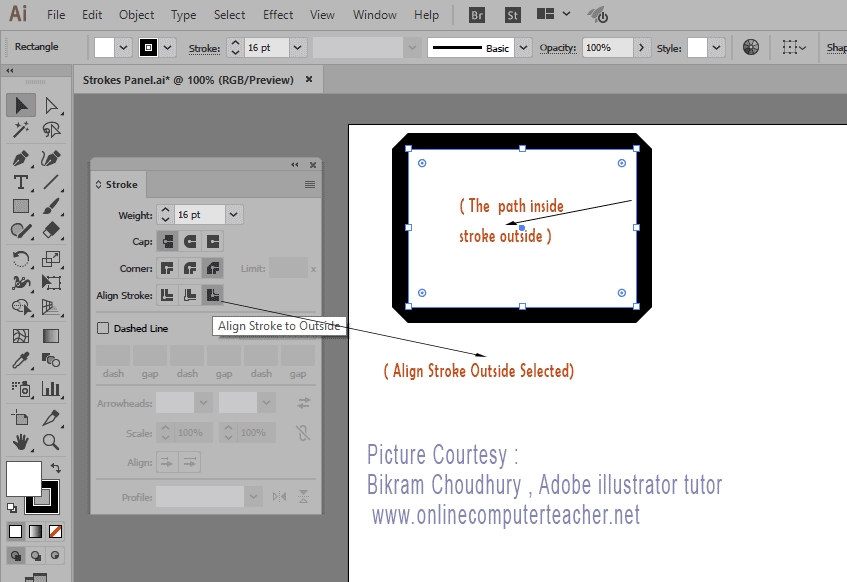
Align strokes outside of a rectangle shape :
In the following figure I have shown the stroke is outside and the rectangular path is inside.
How to draw a rectangle shape in which stroke should be outside ?
1) Draw a rectangle using the Rectangle Tool (M)
2) Then Open the strokes panel (Ctrl + F10) or from the menubar Windows -> Stroke
3) In the stroke panel in Align Corners , select align stroke to outside as shown below, make sure that the rectangle was selected.
Picture 11 :
—————————– The End —————————-